
How to quickly add a user to Ocasta
Applies to: All hubs
Quickly add a user to Ocasta
Getting new people into Ocasta should be simple. Follow these steps to add a user in just a few minutes.
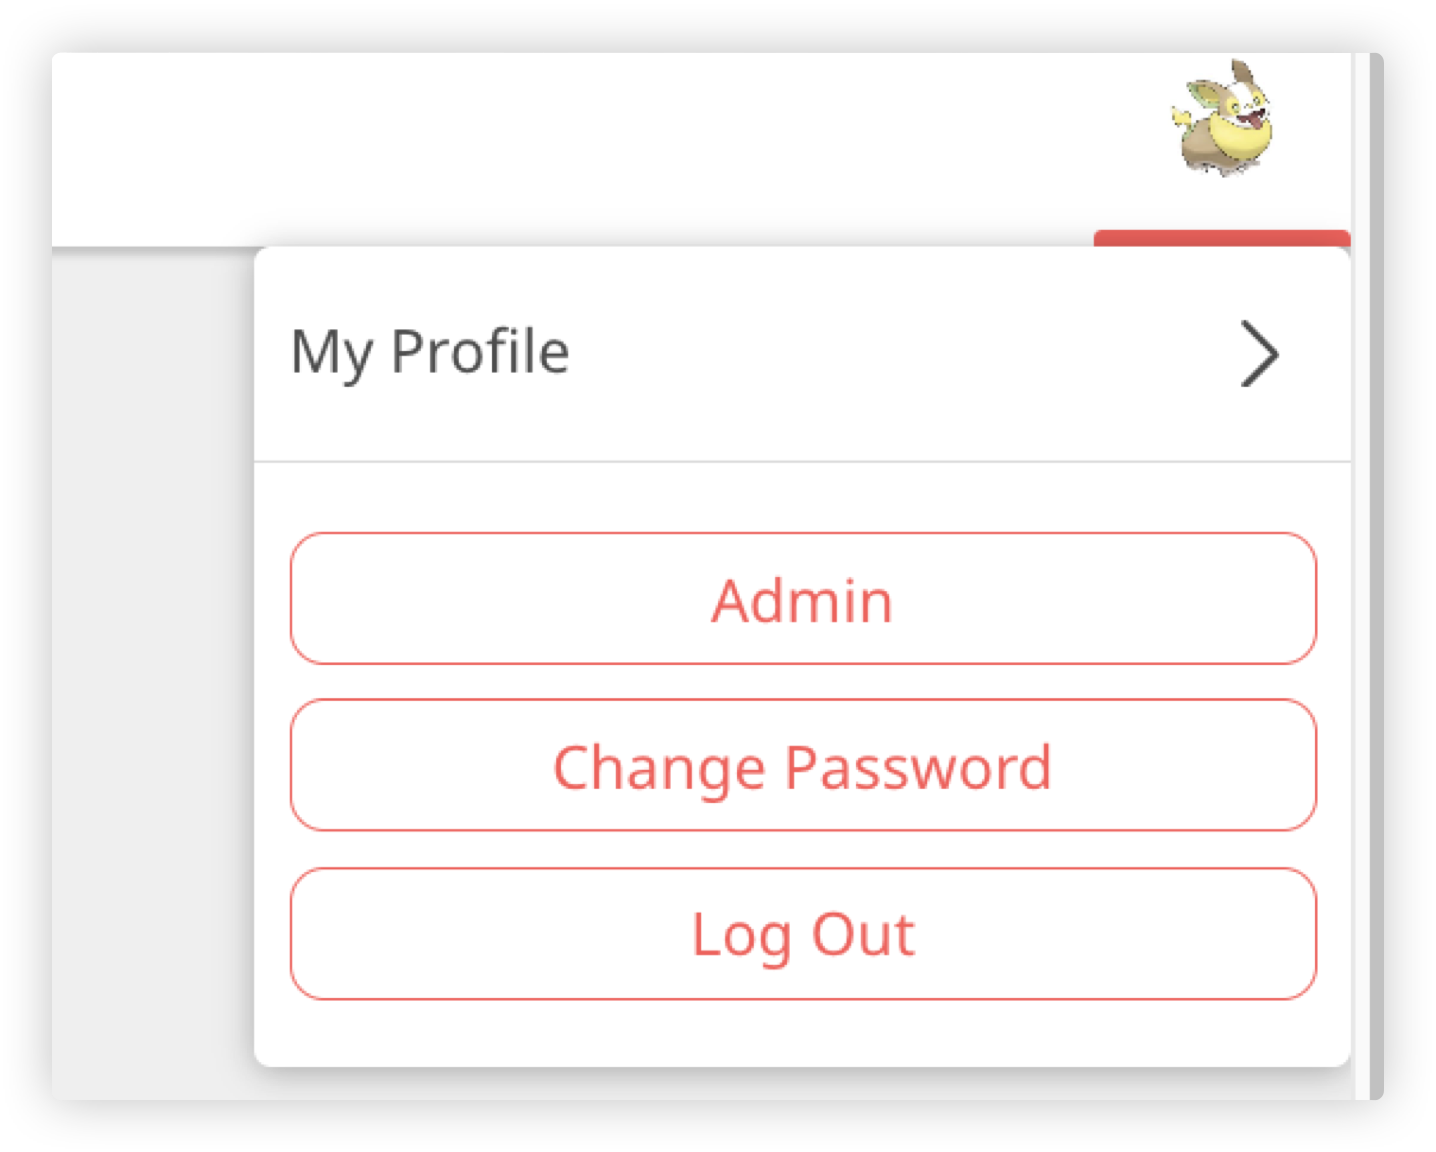
Log in and go to admin
- Sign in to your Ocasta account at yourcompany.oplift.io.
- In the top right, click your profile picture and choose Admin from the menu.
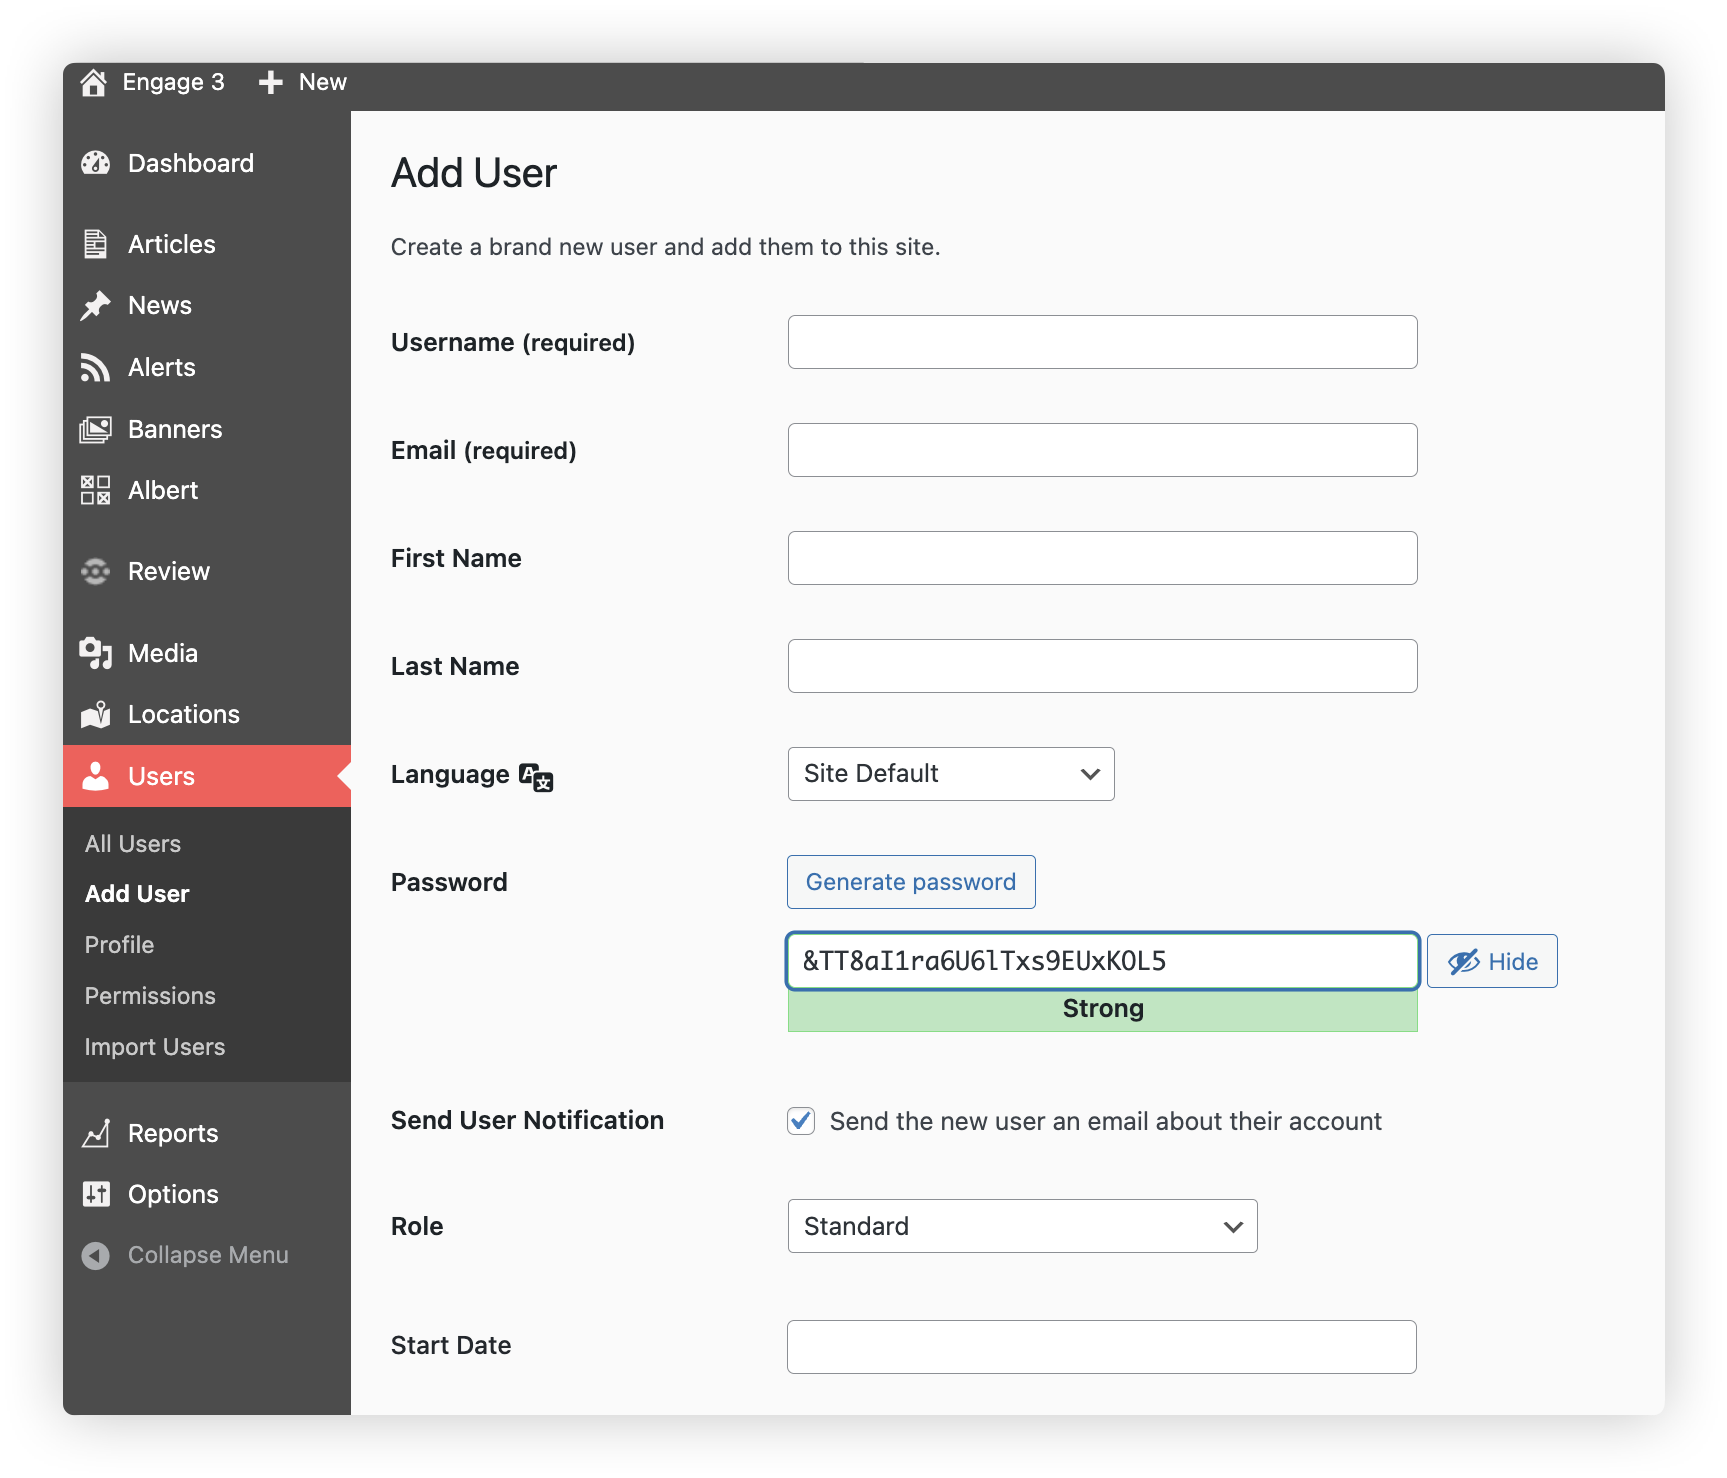
Open the users page
- From the left-hand menu, click Users and then Add new.
Fill in the user’s details
- Complete the form with the user’s information. Here’s what each field means:
- Username — use an employee ID, payroll number or their name. You won’t be able to change this later. It must be unique.
- Email — this is where their welcome email will go. They’ll use this to sign in, reset their password and get notifications.
- First/Last name — visible to other users and in reporting.
- Password — optional – usually we let users set their own via the welcome email.
- Send user notification — tick this to send a welcome email with a link to set their account up.
-
Role — choose the level of access the user needs.
The default roles are Standard, Location Supervisor, and Account Owner.
- Standard and Location Supervisor have front-end access only.
- Account Owner includes access to the admin area.
- Need more control? We can set up custom roles to match how your operation really works. Reach out to the Ocasta team and we’ll help you get it right.
- Location — assign which team or site they belong to. This helps with reporting and targeting content.
- Role override and roam — most people won’t need to change these unless you’re using advanced features.
Tip: users can sign in with either their email or username.
Add them to your organisation
- When the form is complete, click Add new user.
And that’s it. Your user is now added — they’ve got access to the right place and can start using Ocasta 👍