
Getting started setting up a new review template
Applies to: Inspections & Checklists Hub | Observations & Coaching Hub
How do I set up a new template?

1. Navigate to Review Templates
- In the admin, select Review from the left sidebar.
- Choose Review Templates from the list of subcategories.
2. Add a New Template
- Click Add New.
- Enter a Title — this will be displayed on the reports screen in the app.
3. Configure Template Settings
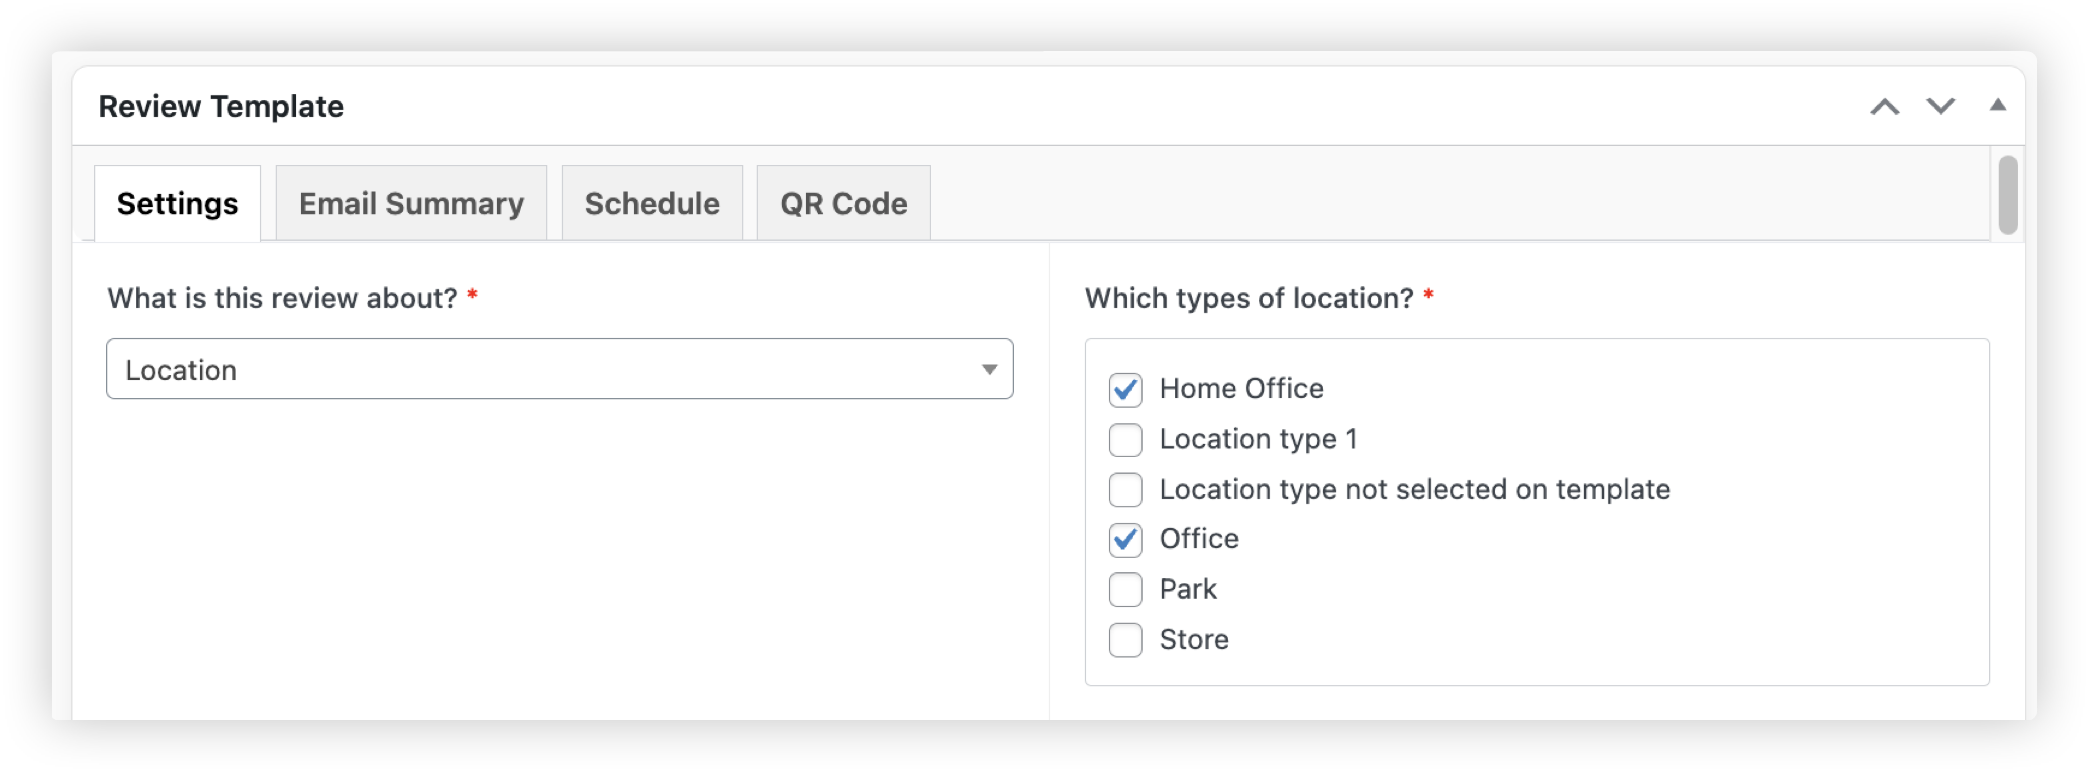
Review Template
- Select the Review Template dropdown — a list of fields will appear.
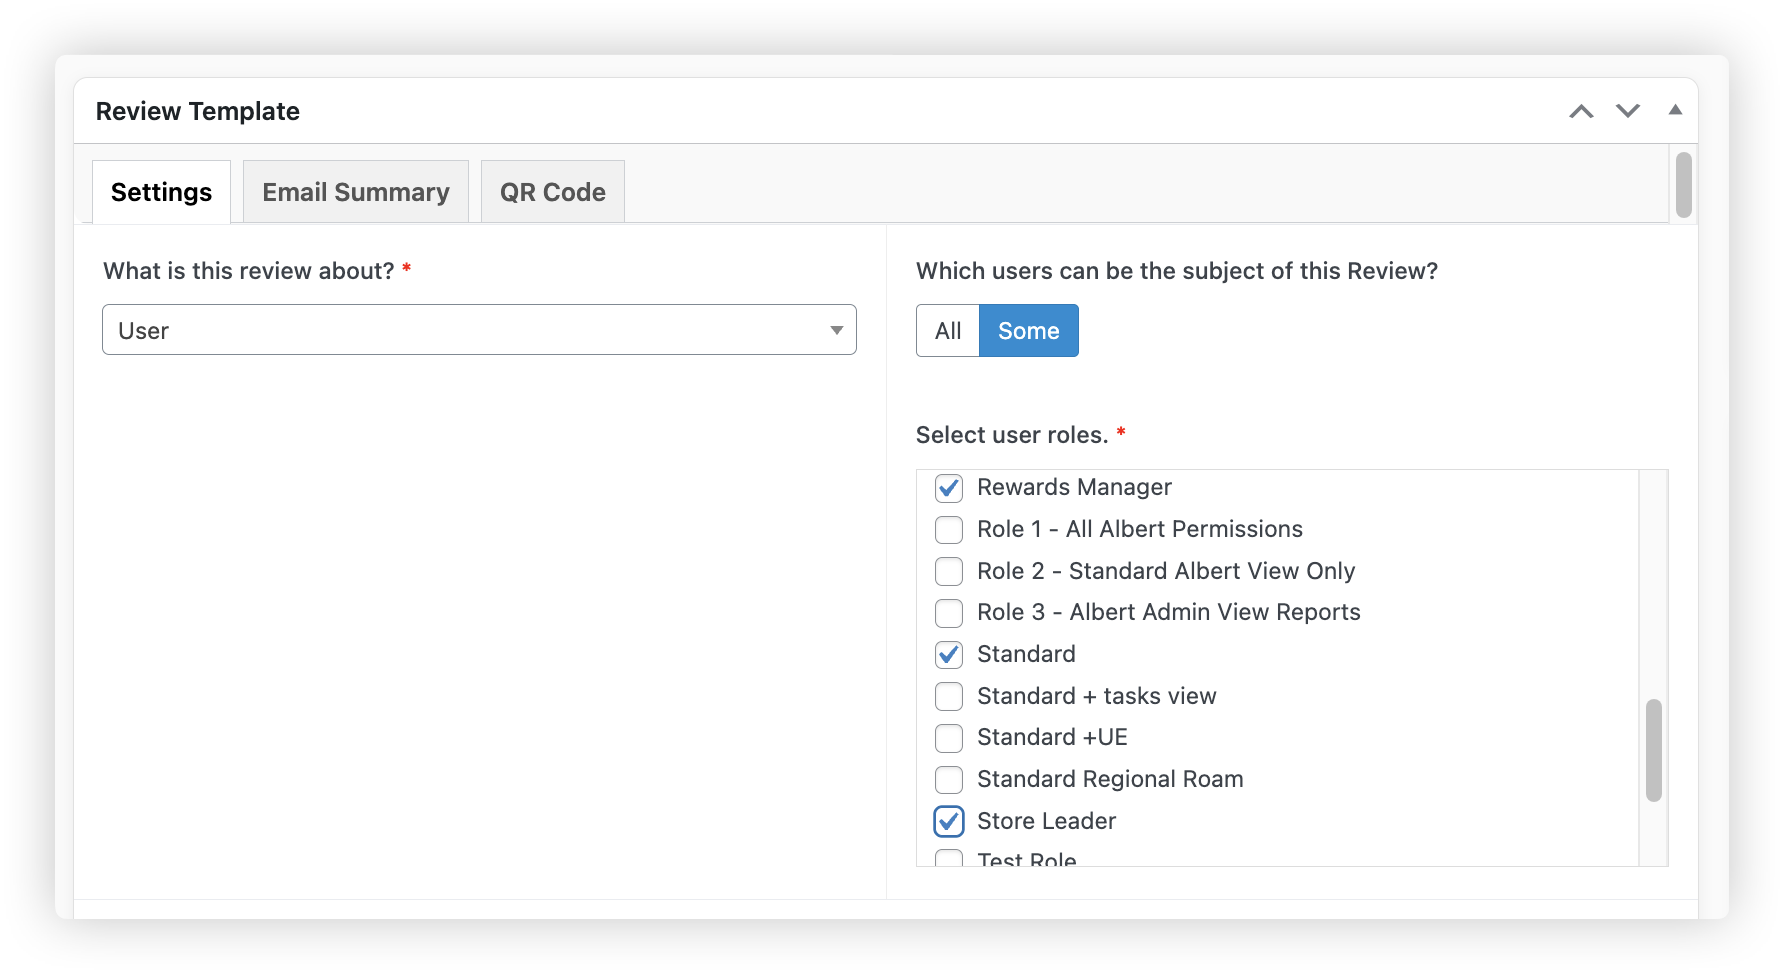
What is this review about?
- From the drop down list, select if your review is about a location, user, or just free text, which is not specific to either:
- Location – You’ll then select the location types your review applies to. Only locations that belong to the selected types can be reviewed.
-
- User – You can then select the user roles the review applies to or leave it set to All. Only users assigned to the selected roles can be reviewed.
-
- You'll also see an additional option where you can toggle yes or no if you would like the observee to be able to view the review.
- Free text – Not tied to a location or user.


Description
- Optionally, add a description. This will appear in the frontend.
Icon
- Choose an icon that best reflects what the review is about - Choose from the library which includes over 1,000 bundled icons or you can upload your own.
- Select an icon color as well.
How are actions assigned?
- Toggle between:
- Oplift User – Actions can only be assigned to users in the system (Will receive notifications)
- Free Text – Actions can be assigned to anyone (inside or outside the system).
Allow gallery and uploaded images?
- Toggle No if you only want photos taken live (not uploaded from the camera roll).
- Read more about this here.
Include URL to full report in email
- Toggle Yes/No – When you submit a report you can share the report via email. If you select 'Yes' this email will contain a URL to the report so that it can be easily viewed in the Ocasta platform, if the person has permission.
Include score in email
- Toggle Yes/No – If Yes, the score will be included in the email after submission.
4. Create Sections and Insights
- After configuring your template, start adding Sections.
- Once sections are created, you can add Insights.
5. Set Review Permissions
- Choose which roles can perform the review.
- Choose which roles can view the review.
- Read more about permissions here.
6. Set a Schedule
- At the top of the review template you'll see a Schedule tab
- By setting up review schedules, you can make sure essential tasks like daily checklists, store visits, and inventory checks happen consistently and are tracked effectively.
- You can also set up a One Time Review that needs to be completed for every location — like updating a POS poster.
- How to set a schedule on a review
7. Set a start Condition
- At the top of the review template you'll see a Start Condition tab
- This allows Review Managers to set extra eligibility rules — like requiring someone to have been reviewed using a specific template within the last X months, and to have scored at least X% in their last review. It means better quality, more consistent reviews.
- How to set a start condition on a review
8. Save or Publish
- Save as Draft or Publish your template immediately.